
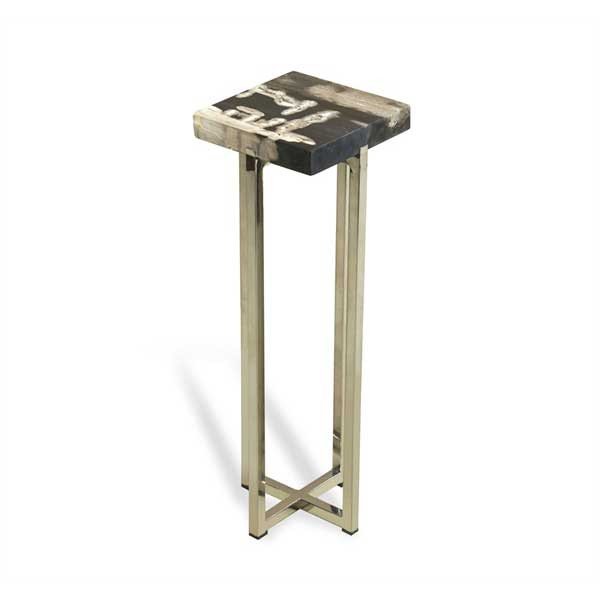
 I am in love with this little table – the price, not so much. It’s called the “Argo” and it costs anywhere from $350-$550 depending on where you look. It’s a drink table and as the name implies, it gives you space to set a drink or two. I am obsessed with drink tables, and I think they have a place in every home, however I don’t think they need to be $500.
Anyway, for the past two weeks I have had the “creative crazies”. I have a ton spastic energy and far too many ideas. I have also been on a mad purge, going through all of my design files and magazines in an attempt to distill it down to what inspires me most. Take last night for instance, I was sitting on the couch enthralled by a renovations episode on HGTV when I was suddenly compelled to create my own mirror-topped drink table.

I used a brushed nickel floor candle holder and a mirrored tray. The candle holder had been on my fireplace hearth for over a year and the tray was happily living at our shop, Apartment 46.
I literally got in my car and drove to my store in the middle of the night because I was obsessed with my own idea. Both items were then combined with a healthy dose of epoxy and are now celebrating their new incarnation as a drink table in someone else’s living room, (because I was talked into selling it). I loved my own idea so much I repeated it with a vintage brass table base and a papier mache Italian tray.
 The old design adage is that for every chair there should be a place to easily put your drink – and I love that. A coffee table is great if you can reach it from every seat in the room but that’s not often the case. You don’t need to have a large side table to place a glass on, you need a candle base or an old table base and a sturdy tray!
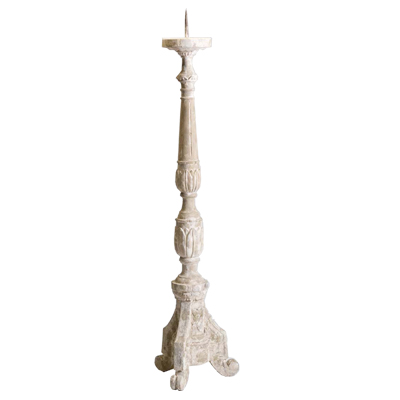 If you want to use a candle holder as your table base, be sure it’s a floor candle holder. You want it to be tall enough to be useful. Also, ensure that it has a weighty, sturdy bottom to balance out any top-heaviness of a tray plus drinks. This stone floor candle holder is definitely weighty enough, and the spike can be removed. Many tall candle holders have a metal spike in the center to hold a candle steady. These can be broken off with a solid pair of pliers or nail/bolt cutters. Sometimes they come off easily, sometimes it’s a bit of a struggle so be careful! If you end up taking a chunk out of the candle holder that’s okay. Your tray will cover it.
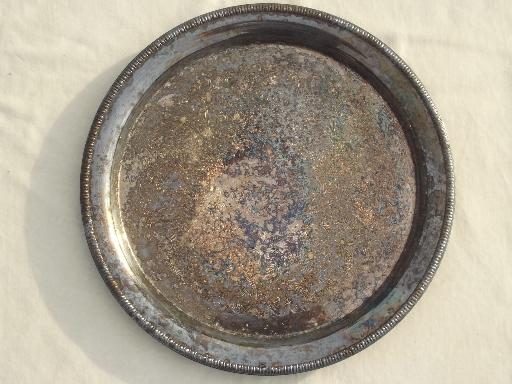
I love the idea of tarnished silver trays as drink tables. There is something soulful and bittersweet about old silver and it’s fantastic when utilized in an unexpected way. Metal trays are also a great counterpoint to a wood or stone base.
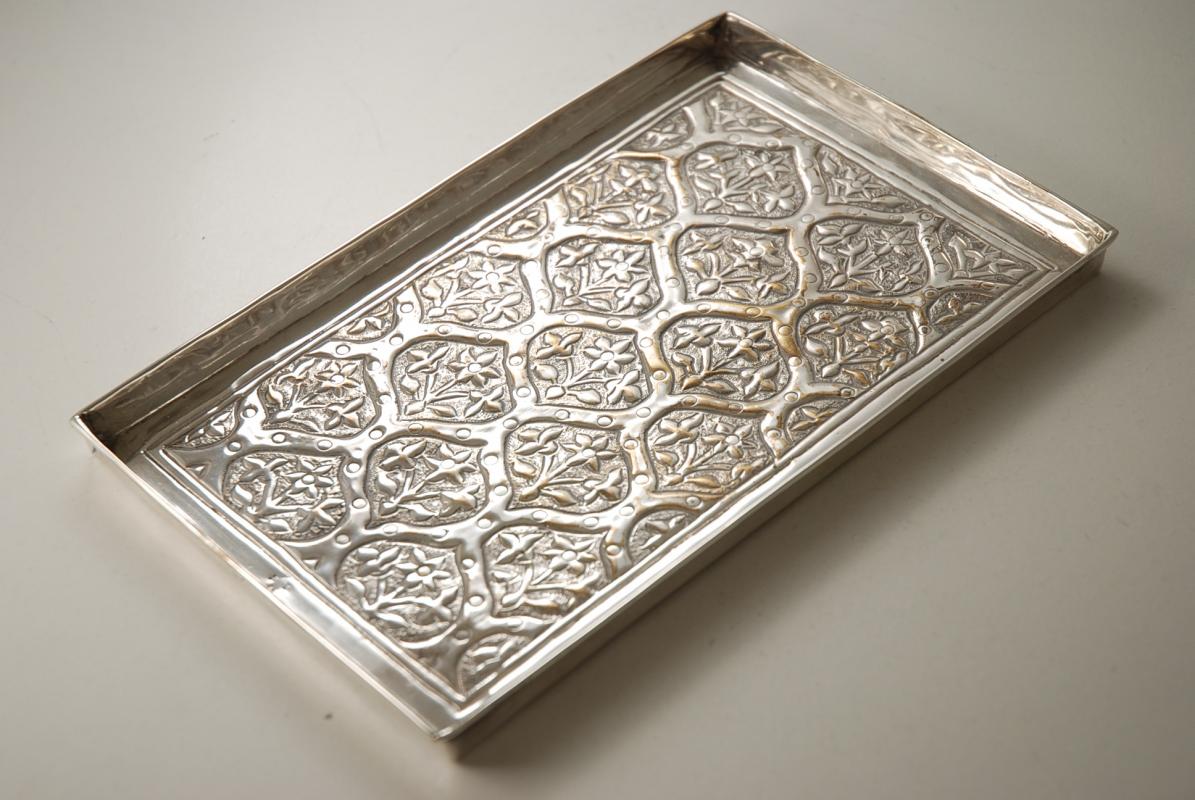
Don’t feel you have to stick to round when it comes to the tabletop shape. You can use a rectangular or oval tray and create something unique and fabulous. The Italian tray I used was an exaggerated rectangle. The antique sterling tray above would be beautiful as a drink table and it would likely get much more use and admiration than if it were sitting on a shelf somewhere. I am always trying to find a way to re-purpose vintage items in fresh new ways. For me, it’s all about giving something new life in today’s world and drink tables are versatile and super convenient for space-constrained homes.
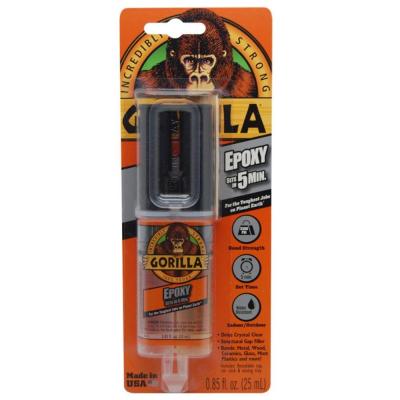
Lately I’ve been super into two-part epoxy because it holds incredibly well and is relatively easy to apply. You take off the tip and squeeze it onto a piece of cardboard or heavy duty paper and kind of mix it up and apply it. I use a paint mixing stick to smear it onto the flush part of the candle holder because it’s thick and messy. I also apply it to the bottom center of the tray I’ve chosen.
Use a generous amount and wipe off whatever seeps out once the tray and base have been connected. I like to turn my pieces upside down to cure because the weight of the bottom piece gives it a tighter seal. You could also put something heavy in the center of the tray but it may fall off or fall over. I learned the hard way that upside down works best for me.
Epoxy creates strong fumes so I recommend applying it outdoors and letting it cure before bringing your piece inside. I checked my tables after a couple hours just to be sure the tray top hadn’t shifted and brought them in fully cured the next morning.
If you end up making a drink table of your own please send me pics! I’d love to see your creations.
Happy Making!
Melisa
Back to Main Site